Last Updated 15 December 2020
You’ve got a favorite website and use it every day. But you want to open it like an application from your dock so that it feels more native to your computer. You also want to place the launch icon wherever you want on the Mac’s Dock. The answer is to create a true website shortcut on your Mac Dock for that more native feel.
Like a puppet maker out of a (terrifying) 19th century children’s story, you want your web app to be just like a real boy.
Here’s the good news. Adding a web shortcut (aka a webloc) to your Dock is pretty simple. And it can be done without downloading any third-party applications. In this tutorial, I give you a step-by-step guide to creating a web shortcut file, creating an app launch icon, and instructions for how to get that icon onto your dock. An example image file is included as well. But you can make your own image too.
Then we’ll use an online icon converter to turn the image file into an ICNS (Apple Icon Image), which I’ll walk you through later on.
Steps Included in This Tutorial:
- Make a Website Shortcut URL File
- Make the Icon Image for the Shortcut
- Prep Your Website Shortcut File
- Move that Website Shortcut Icon to Your Mac OSx Dock!
Feel comfortable copy/pasting a small amount of script? An even simpler method walks you through the step-by-step process of creating a short app script to launch a website in a specific browser.
1. Make a Website Shortcut URL File
- Begin by navigating to the the web site you need a shortcut from, using your browser (lately I’ve really been digging the Brave Browser). If you’re making a shortcut to an authenticated web app, sign in to your respective account before pulling the URL.
- Then highlight the URL text at the top of your browser and click–and–drag that URL onto your Desktop.

2. Make the Icon Image for the Shortcut
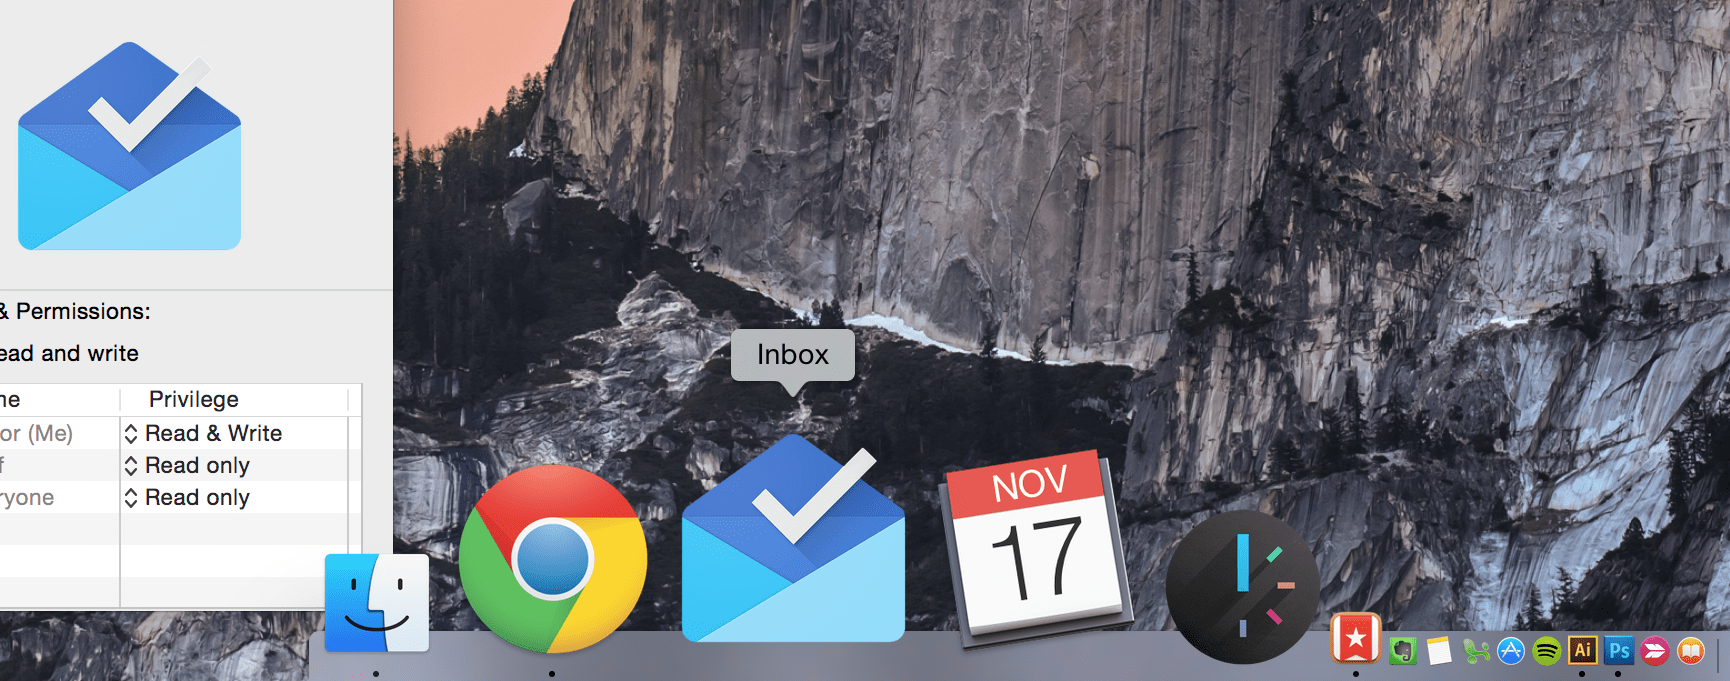
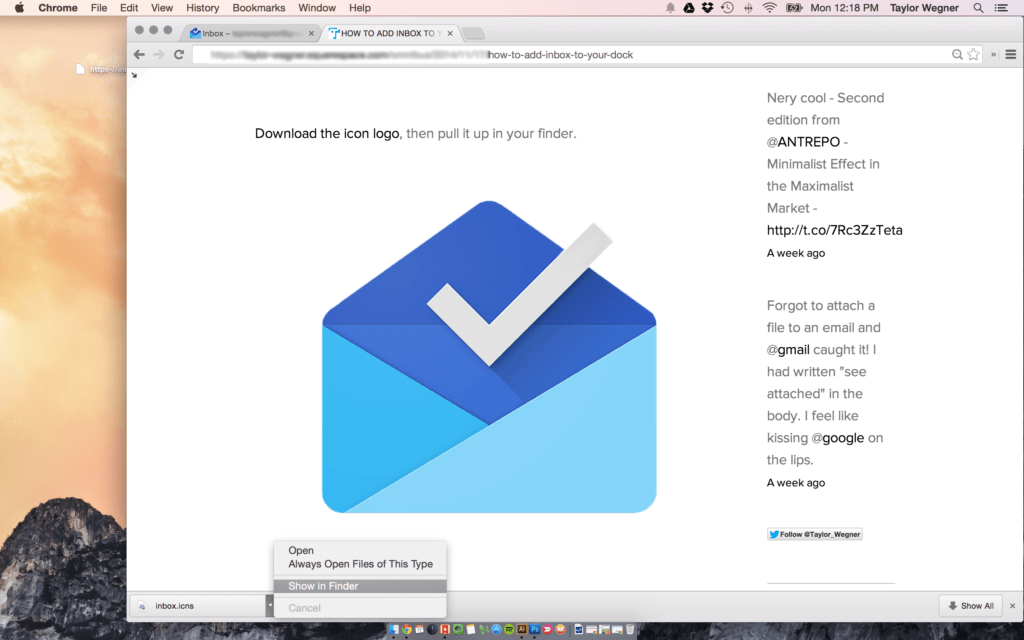
- Download or create your desired icon image. In this tutorial, I’ll use this example Google Inbox PNG image file. Mostly because I miss Google’s Inbox app every day. RIP.
*Just make the image square, with exact dimensions of either 256px x 256 or 512px x 512px. Save it out as either a PNG (recommended) or JPG. - Optional: If you want to make your own image, go for it! There are tons of resources out there for learning design.
- With your PNG or JPG image in-hand, convert it to an ICNS file. There are plenty of easy and free services where you can easily convert your image file into ICNS file.
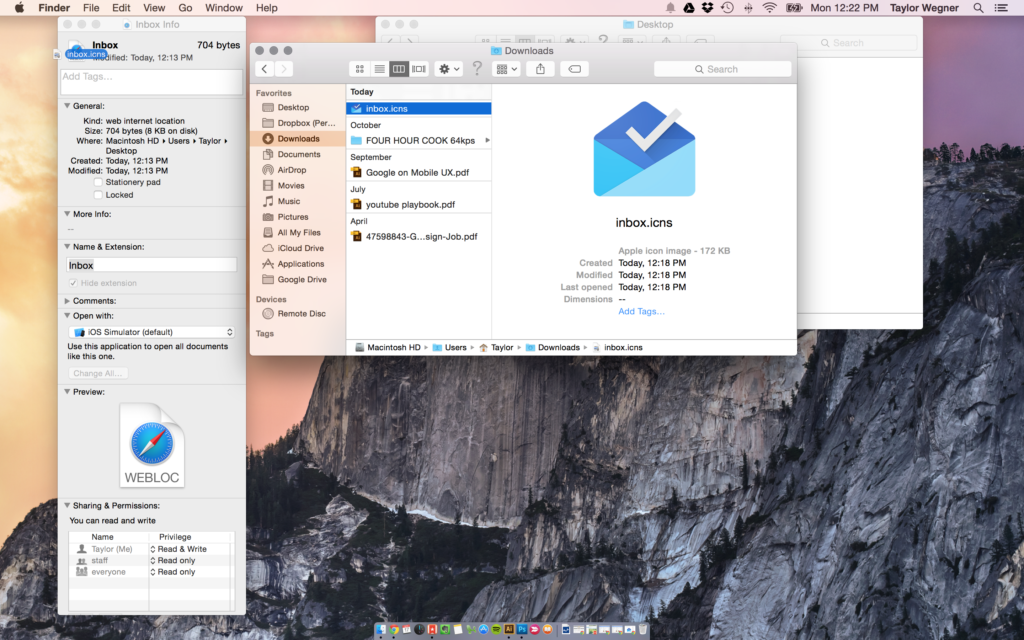
- With your new ICNS file ready, pull it up in your Finder. Leave this Finder window open, and continue to the next step.
3. Prep Your Website Shortcut File
Okay, you’ve pulled the URL onto your Desktop and now have an icon file ready to go. Nicely done!
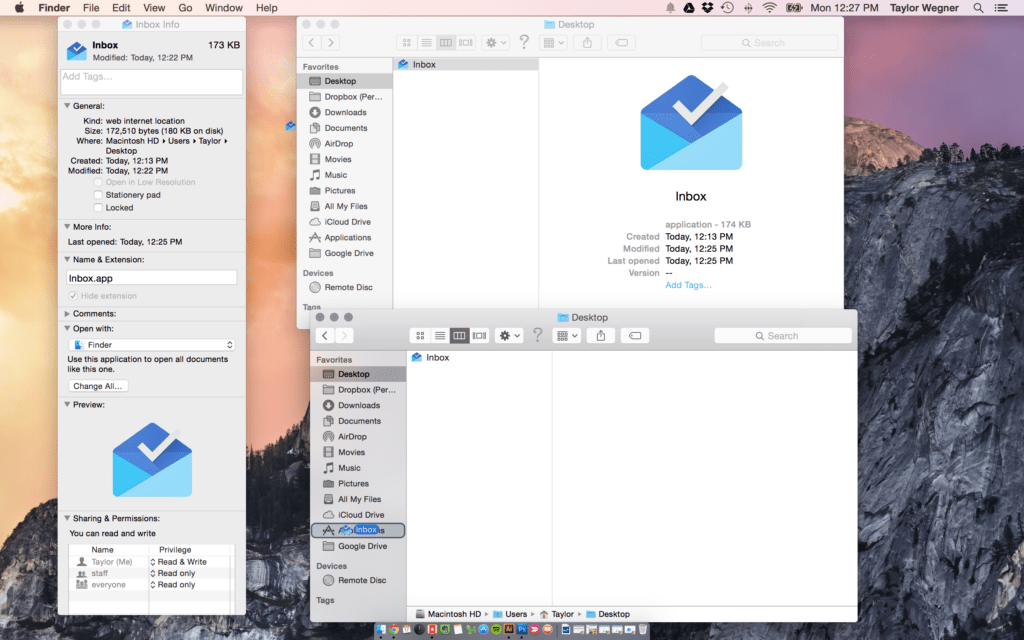
- Open a second Finder window alongside the Finder window that’s already open for your icon file (which will be in your Downloads folder if you us ed the icon in this tutorial).
The keyboard shortcut to open a new Finder Window is “ Cmd + N ”. This is one of many useful shortcuts on a Mac. - Select the shortcut URL file you made in step 1 (it’s on your Desktop) and use the “ Cmd + I ” shortcut to open the Info window. Alternatively, you can also right click the file and “More Info”.
- You now have three windows open and your screen should look something like this:
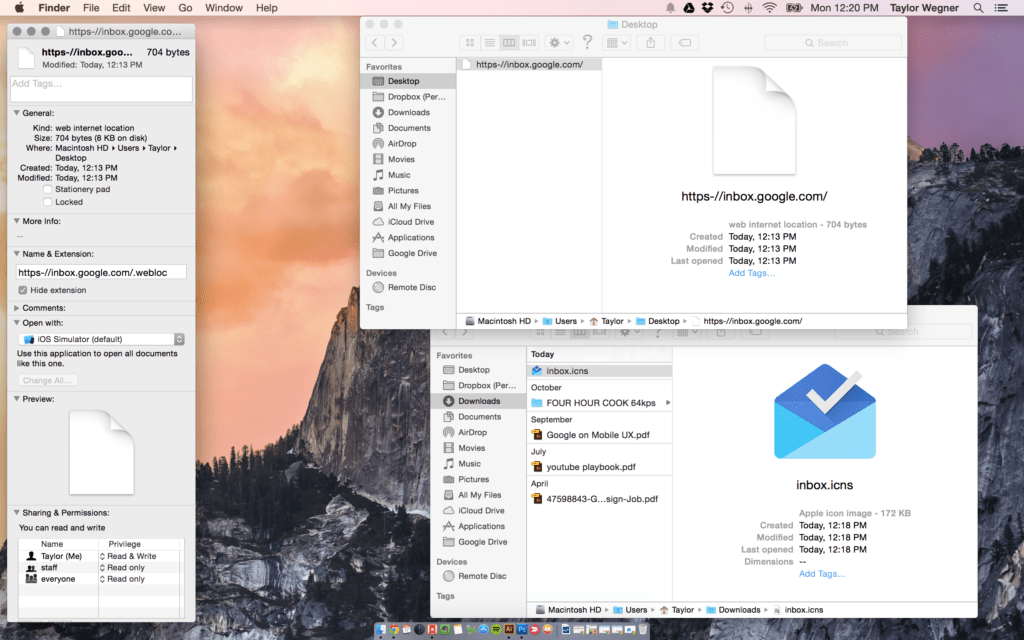
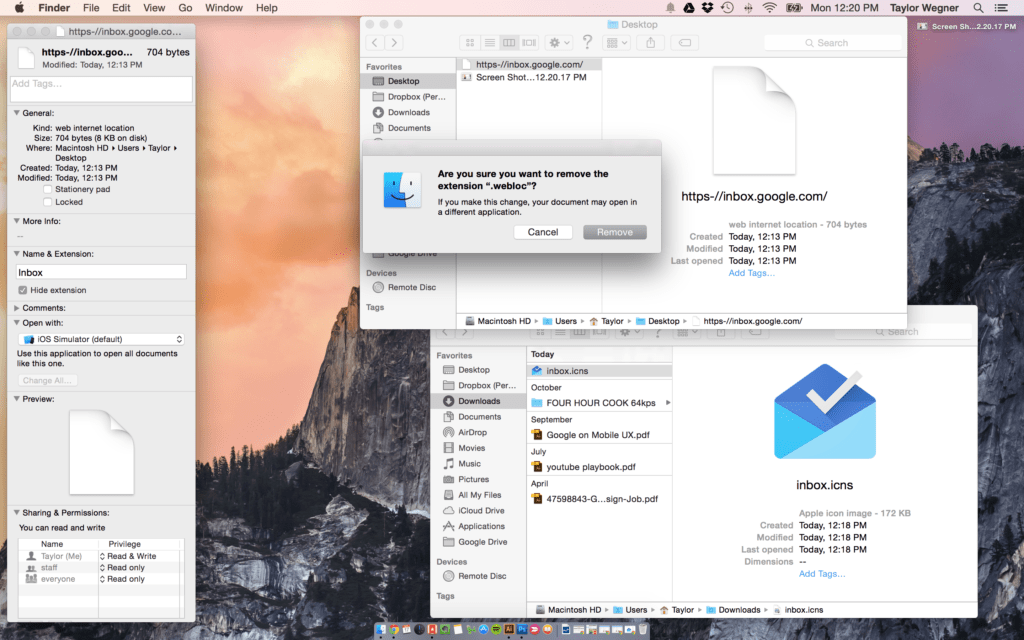
- Click–and–drag your ICNS icon file from your Finder window and release it in the top left corner of the Info window, over the preexisting WEBLOC file icon.
- Remove the .webloc extension and hit enter. At the prompt, go ahead and hit Remove.
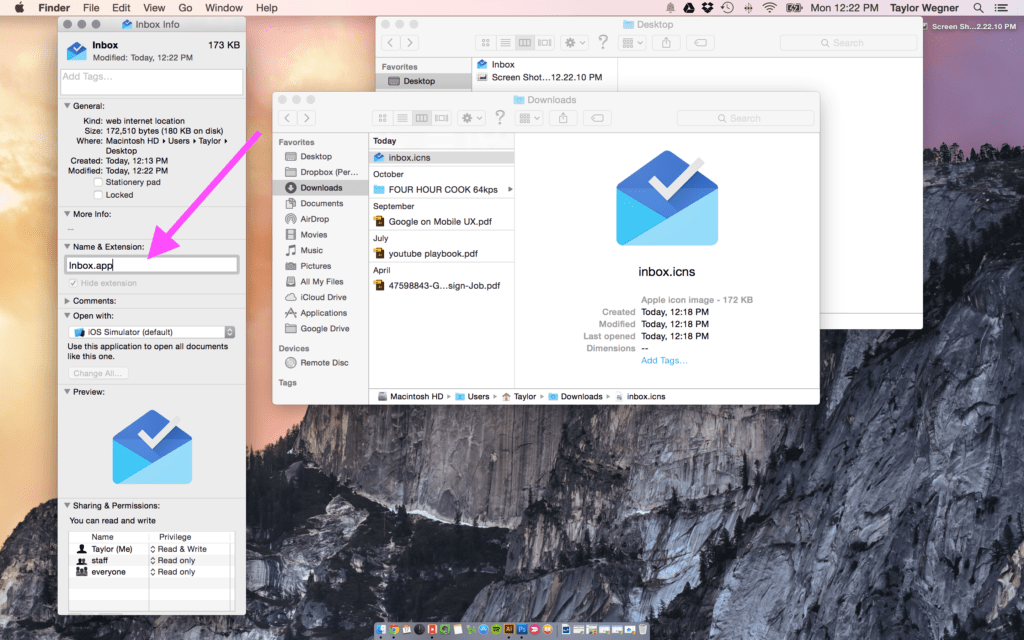
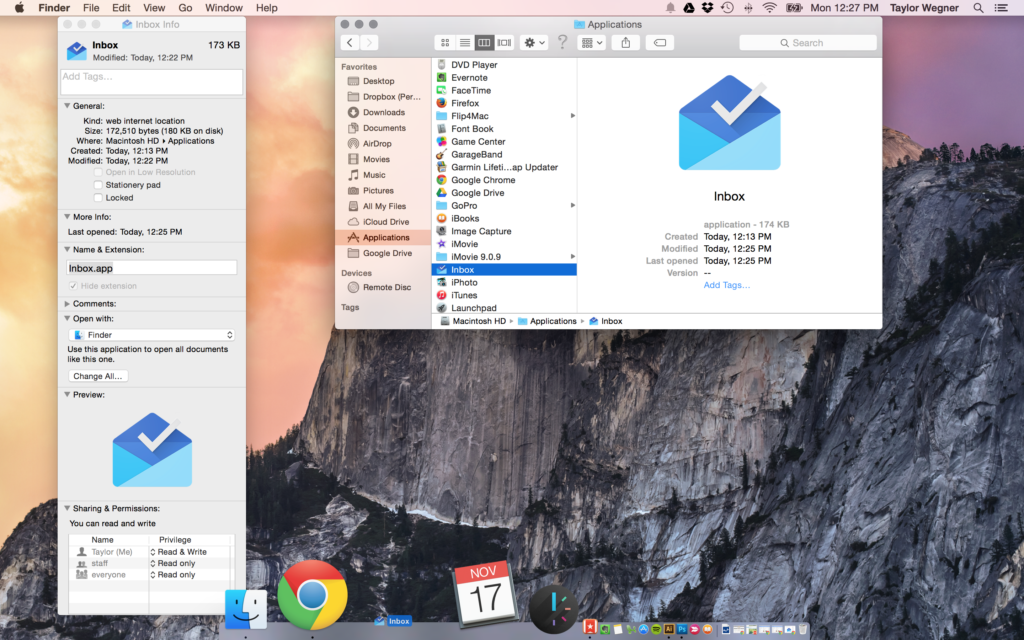
- Next, change the the Name & Extension “[[yourApp]].app” and hit enter. In my example, you’ll notice mine is “inbox.app” now.
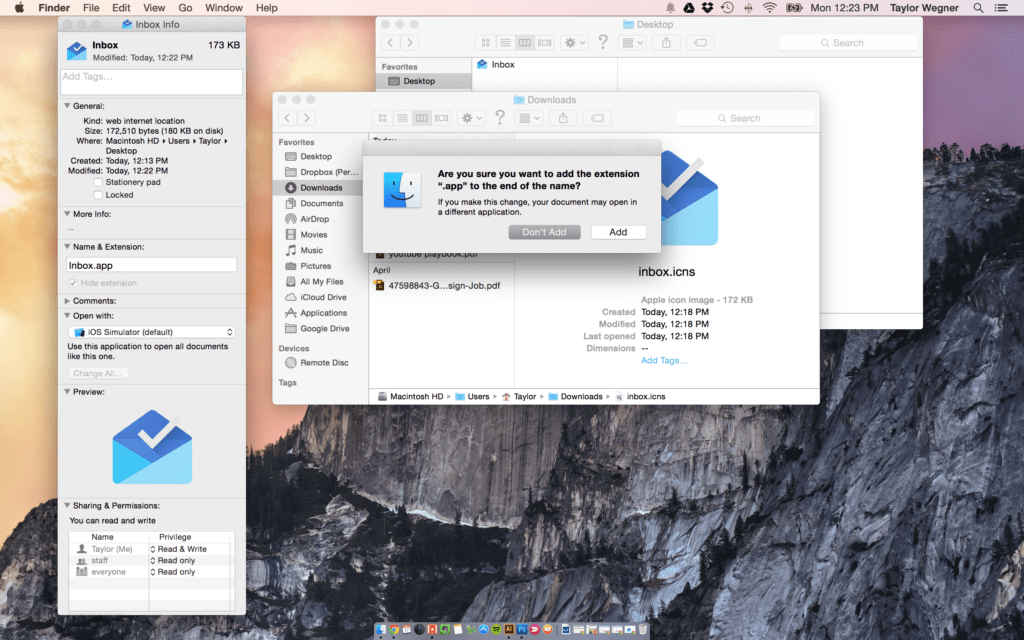
- An alert will pop up asking if you want to change the extension. Select “Add”.
➡ IMPORTANT: In newer operating systems like Catalina, the icon on your in-progress shortcut icon will turn blank. Do not despair! It will return if you follow the rest of the steps exactly.
- Now that you’ve prepped the modified shortcut URL file (let’s start calling it the “[[Your App]]” file now), click–and–drag it from your Desktop to your Applications folder.
4. Move that Website Shortcut Icon to Your Mac OSx Dock!
- From the Applications folder, click–and–drag the [[Your App]] file to your Dock.
- Next, remove the “.app” extension from the Name & Extension in the Info Window and click enter. This will return your icon image in the Info Window, but not the dock.
- Lastly, to fix the dock image, simply select your shortcut on the dock to launch your URL shortcut and fix the dock icon a well.
- *Note for M1 Mac users: You may M1 need change extension back to .webloc at this point. (shout-out to Stanley for this great tip!)
As a final note, despite the Info Window saying the shortcut will open in Safari, it will automatically open in whatever you’ve previously set as the system’s default browser. Mine opens in Brave just fine.
You’ve Successfully Created a Website Shortcut on a Mac Dock
Congratulations, you’re ready to go! You now have a working Dock icon shortcut that will launch your web site URL. Close out of your Finder windows and open [[Your App]] from your Dock!
If you didn’t get your custom icon to display properly, please double-check the steps above and make sure you got each one of them.
Have a question? Let me know in the comments below!
Revised and updated February 25, 2021. Originally published November 17, 2014.
THIS POST IS NOT AFFILIATED WITH OR ENDORSED BY GOOGLE. INBOX BY GOOGLE AND THE INBOX BY GOOGLE LOGO ARE THE PROPERTY OF GOOGLE INC.
This page contains some affiliate links. If you follow an affiliate link and purchase a product or service we may receive a commission. It’s what helps us keep content like this free. Regardless of potential revenue, we only recommend products or services we truly believe in.
Hi – brilliant run through of how to do this. I wanted a You Tube dock icon after paying for the premium service.
Everything worked fine apart from right at the end – I had to change the file extension back to .webloc else it viewed the icon as a text document for some reason. Works great now – excellent.
Nice! I’m glad it (mostly) worked for you. I’ll re-check the process and make that update. I appreciate you pointing this out!
Thank you for this, but I want to force the specific URL to open in a specific browser like Chrome even when my default browser is Safari. It doesn’t seem to work. Is there any workaround for this scenario?
By default, .webloc files will always open with your system’s default browser. It used to be easier to change this, but recent macOSs have it pretty locked down.
So, I could suggest simply setting Chrome as your default browser, which can be done in Chrome’s settings. If that’s not okay, your best course of action is creating a simple script. It’s actually pretty straight-forward. Here’s the rough process:
1) Open your Mac’s “Script Editor” app.
2) Start a new document
3) Paste in a super short script (you can copy the code from our simple how-to guide).
4) Save it
5) Move the new .app file to your Applications folder
6) Drag it onto your dock.
This method still allows you to open the info panel in finder (as shown in the tutorial), and change the app icon image.
Here’s our full guide on how to launch an website from your dock using a simple script.
I hope this helps! We really appreciate you reaching out and thank you for being a reader.
What a fantastic article, well written and super clear! Thanks
Truly appreciate the kind words, thank you. Above all, glad it was helpful!
Thanks, working on M1 (had to change extension back to .webloc at end)
Glad it worked for you! And thank you for the insight from an M1! We hadn’t been able to test on an M1 yet (count me jealous). I’ll make sure your tip gets added for future M1 users.
I followed all the steps and it didn’t work. I re-added .webloc and it opened in Safari just fine – and that’s OK because I use Safari.
Thank you for letting me know! I’ve heard similar feedback from people with newer ‘M1’ Macs needing to make that switch at the end. I’m glad the tutorial (mostly) worked for you. After a little troubleshooting of your own, that is 😉
I’ve made a change to add the ‘.webloc’ step at the end of the tutorial. Thank you again!
Hello Taylor and thank you for your tutorial.
You did a wonderful job at being very specific and detailed. That is much appreciated!
After going back through a couple of times to see if I overlooked a step, I’m still having a problem with one thing.
I was able to move the app to the dock, but it gives no option to “keep in dock”. I’ve tried to place it with the apps permanently in the dock but it will not take it there.
Does this make sense?
Hey Shelah, I’m sorry I didn’t see this sooner! I appreciate the kind words and am sorry you hit this sticking point! I think I’m following you.
If you’re still blocked from your effort in December (or would like to revisit it), here’s what I’d say. Not seeing the choice to “Keep in Dock” (by long-clicking an icon in the Dock and going to “Options”) is an expected behavior. Most of the apps on the newest macOS should only have the option to “Remove from Dock” in said options list. There are three sections in the Mac Dock now, from left to right: apps permanently in the Dock, apps recently used, and currently open/minimized windows. So long as you’re dragging the new app icon to the left section, it should stay there, no problem. One asterisk: your new app icon will never get the ‘open’ visual treatment other actual apps do since it’s just launching something in your chosen browser app. I hope this helps!
worked a treat 🙂 Thanks
You’re very welcome! Thanks for giving me a shout, John.
So all of this works and I am able to get it into my dock and when I click it, it launches my browser and does everything right. Now I want to capture this in Jamf and deploy to a bunch of machines. But when I take the file from the /Applications/ directory and put in Jamf composer it only has the plain text webloc file, there is no icon file also there is no reference in the webloc file to where it would use an icon file. Where is the plist and icon file stored that would map the image to that specific webloc file? It has to be somewhere on the mac. Meaning foo.webloc is using icon file test-foo.icns
Hey Bret, I’m glad this worked for you! Sorry I’m just seeing your comment now – did you ever figure out and track down the location? I don’t have an answer myself.